

Supervised machine learning often assumes that the labels we train our model on are correct. ML models have progressed remarkably within this paradigm, exceeding 99% accuracy for predicting the given labels in the classic MNIST image classification dataset of handwritten digits. If our data are labeled correctly, this is excellent news, but recent studies have discovered that even highly-curated ML benchmark datasets are full of label errors. Furthermore, the labels in datasets from real-world applications can be of far lower quality. As the adage “garbage in, garbage out” cautions, it seems problematic to teach our ML models to predict fundamentally flawed labels. Even worse, we might train and evaluate these models with flawed labels and deploy the resulting models in systems that affect our daily lives.
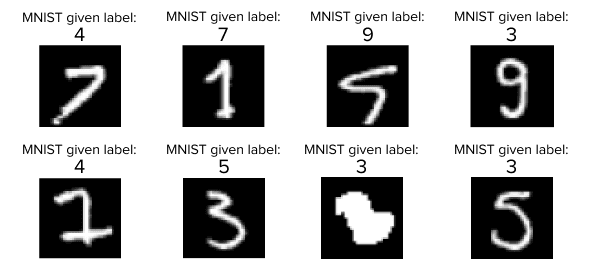
Luckily there are tools to help prevent this! The open-source cleanlab library helps you find all the label issues lurking in your data. In this hands-on blog, we’ll use cleanlab to find label issues in the MNIST dataset, which has been cited over 40,000 times. This dataset contains 70,000 images of handwritten digits from 0 to 9 (these are the labels to predict). Here are some of the MNIST label issues found by cleanlab:
This post will show how to run cleanlab to find these issues in the MNIST dataset. You can use the same cleanlab workflow demonstrated here to easily find bad labels in your dataset. You can run this workflow yourself in under 5 minutes:

Overview of the steps to find label issues with cleanlab
In this post, we will walk through the following steps:
-
Build a simple PyTorch neural network model to classify digits.
-
Use this model to compute out-of-sample predicted probabilities,
pred_probs, via cross-validation. -
Identify potential label errors in one line of code with cleanlab’s
find_label_issues()method.
The rest of this blog dives into the code implementing this workflow.
Show me the code
Prepare the dataset
The MNIST dataset can be fetched directly from OpenML.
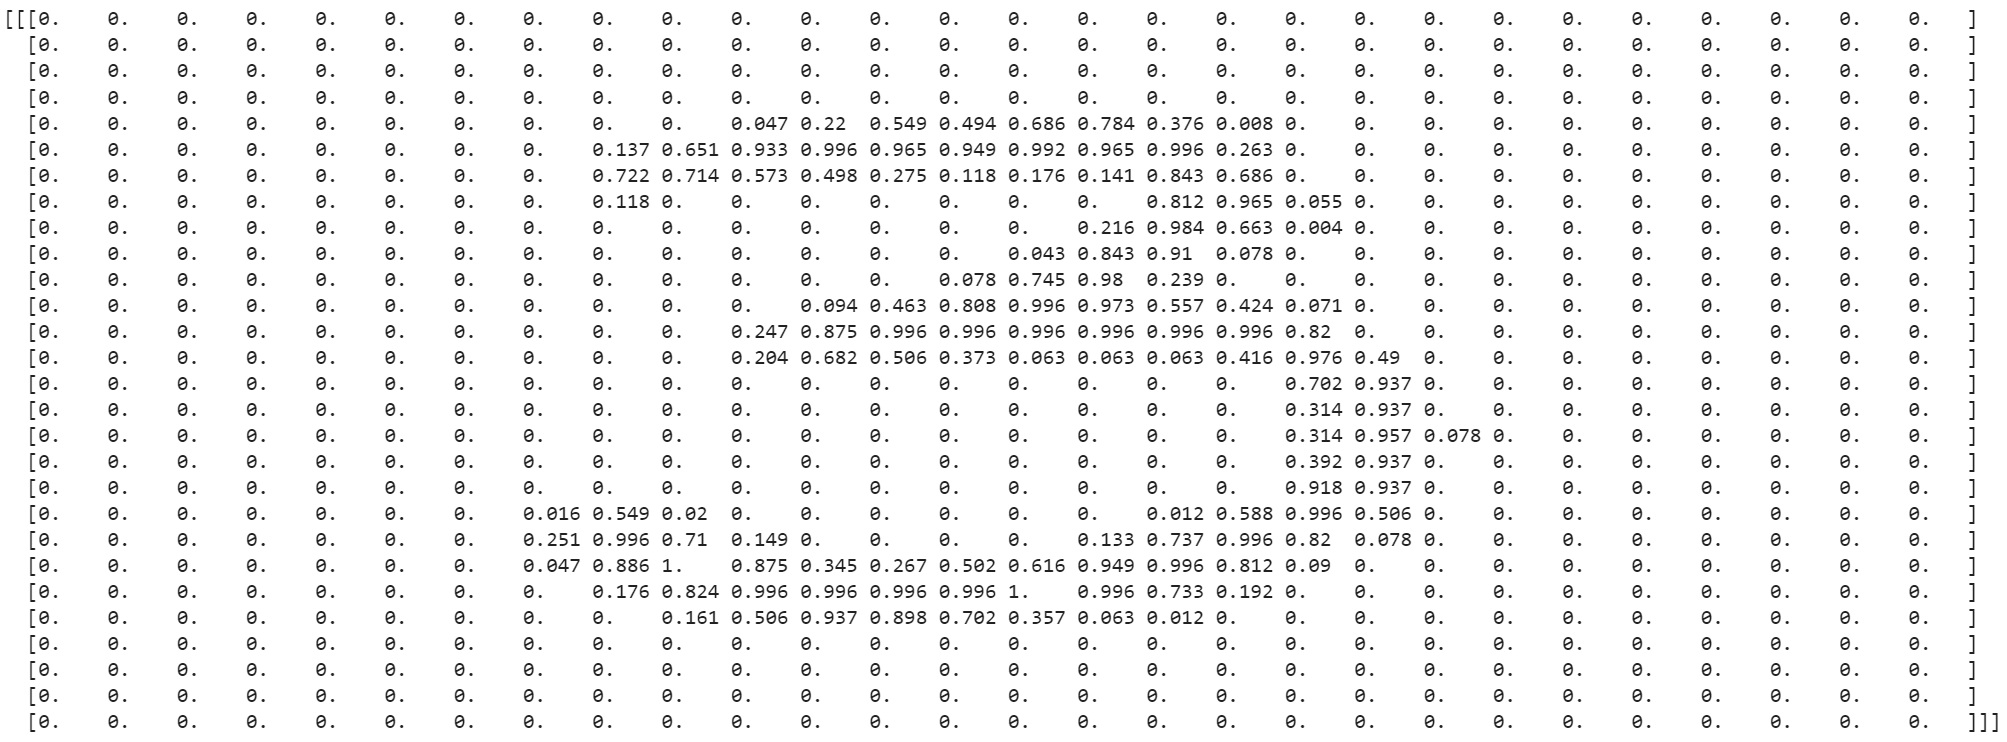
Once we have the data, let’s assign the image features to a variable X, which OpenML gives us as a 2D array. Each row in this original array represents an image with its features flattened as a 1D row vector. Each entry in this vector has a value ranging from 0 to 255, representing the intensity of a particular pixel in the image (MNIST images are in grayscale).
To apply convolutional neural networks to our features X, we’ll normalize their values to the [0,1] interval, and then reshape each element of X to a 2D image with: height, width, and a channel dimension that happens to be 1 since MNIST images are grayscale rather than RGB.
Note that if we were to model this data with a fully-connected neural network, this reshape would be unnecessary since fully-connected networks typically operate on 1D vectors.
Now that we have prepared the image features let’s also assign the image labels to a variable y, stored as a 1D NumPy array. The labels are values in {0,…,9} corresponding to the digit depicted in each image.
To find label issues in your image dataset instead of MNIST, you simply need to assign your data’s features to variable X and its labels to variable y instead. Then you can apply the rest of the workflow from this post directly as is!
Define an image classification model
Our supervised learning task is to classify which digit is depicted in an image. We’ll use a simple convolutional neural network with PyTorch (ConvNet).
Our model has just two convolutional layers and two fully connected layers.
Feel free to replace the above network with any PyTorch model: cleanlab can actually be used with any classifier!
As some cleanlab features leverage scikit-learn compatibility, we’ll wrap the above PyTorch neural net using skorch, which instantly makes it scikit-learn-compatible. Below, we’ve set max_epochs=50, but this is left to the default of 10 in the Colab Notebook to speed up the execution time. Feel free to lower this value to get results faster or increase it to get better results.
skorch also offers many other quality of life improvements that simplify deep learning with PyTorch. Alternatively, you can also easily wrap an arbitrary model to be scikit-learn compatible, as demonstrated here.
Compute out-of-sample predicted probabilities
Generally speaking, cleanlab uses predictions from a trained classifier to identify label issues in the data. More specifically, these predictions should be the classifier’s estimate of the conditional probability of each class for a specific example (c.f. sklearn.predict_proba). Check out this blog post on Confident Learning to learn more about the algorithm cleanlab uses to find label issues.
Typically we’ll want cleanlab to find label issues in all of our data. However, if we train a classifier on some of this data, then its predictions on the same data will become untrustworthy due to overfitting. To resolve this, we will train our classifier with K-fold cross-validation which enables us to get the out-of-sample predicted probabilities for each and every example in the dataset. These are predictions from a copy of the classifier trained on a dataset that does not contain this example, hence the model is less likely to be overfitted. The cross_val_predict method used below enables you to easily generate out-of-sample predicted probabilities from any scikit-learn-compatible model.
Another benefit of cross-validation is that it facilitates more reliable evaluation of our model than a single training/validation split. Here’s how to estimate the accuracy of the model trained via cross-validation.
Models with higher accuracy tend to find label errors better when used with cleanlab. Thus we should always try to ensure that our model is reasonably performant.
Use cleanlab to find label issues
Based on the given labels and out-of-sample predicted probabilities, cleanlab can identify label issues in our dataset in one line of code.
ranked_label_issues is a list of indices corresponding to examples whose labels warrant a closer inspection. Above, we requested these indices to be sorted by cleanlab’s self-confidence label quality score, which measures the quality of each given label via the probability assigned to it in our model’s prediction.
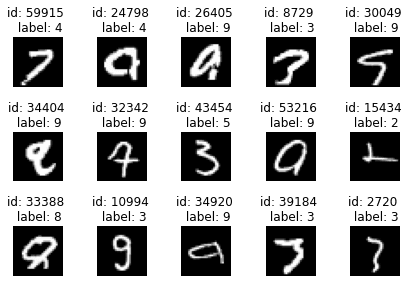
Let’s look at the top 15 examples that cleanlab thinks are most likely to be incorrectly labeled. We can see a few label errors and odd edge cases.
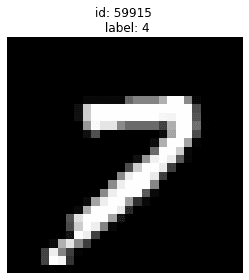
Let’s zoom into some specific examples from the above set:
Given label is 4 but is actually a 7:
Given label is 4 but also looks like 9:

Given label is 5 but is actually a 3:

Given label is 3 but is actually a 9:

Using mislabeled examples like these to train/evaluate ML models may be a questionable idea!
Conclusion
cleanlab has shortlisted the most likely label errors to speed up your data cleaning process. With this list, you can decide whether to manually correct the labels or remove some of these examples from your dataset.
You can see that even widely-used datasets like MNIST contain problematic labels. Never blindly trust your data! You should always check it for potential issues, many of which can be easily identified by cleanlab. While this post studied MNIST image classification with PyTorch neural networks, cleanlab can be easily used for any dataset (image, text, tabular, etc.) and classification model.
cleanlab is undergoing active development, and we’re always interested in more open-source contributors. Come help build the future of Data-Centric AI!
To stay up-to-date on the latest developments from the Cleanlab team:
- Watch and star our GitHub
- Join our Cleanlab Community Slack
- Follow us on LinkedIn or Twitter
Easy Mode
While cleanlab helps you automatically find data issues, an interface is needed to efficiently fix these issues your dataset. Cleanlab Studio finds and fixes errors automatically in a (very cool) no-code platform (no ML expertise required). Export your corrected dataset in a single click to train better ML models on better data.
Beyond its no-code interface, Cleanlab Studio also offers a powerful Python API. Get started with the quick tutorial on image classification
